Weather: Las Vegas, Hoover Dam, Grand Canyon West Rim, Red Rock, Valley of Fire, Death Valley, Eldorado Canyon, Grand Canyon South Rim
Reset Tablet Bluetooth Connection with the ELD
Trekker engine brake information
Tips for maintaining consistent speed
J70
· Hazard lights button intermittently doesn’t cause lights to blink. Instead, the lights will be solid. Simply select the hazard button several times to correct the functionality.
· Driver’s
seatbelt has trouble latching. Must be aligned specifically to latch.
J71
- Jeep rear heater control.
- Push the back door forward to easily pull the pin up to open the back door.
- Cruise control doesn’t work at all. The buttons won’t even allow it to activate.
J75
· Major speedometer error. Issue started around 2020.
· 4WD Low doesn’t engage.
· Cruise control cancel button broken.
· Intermittent red blinking light above temp gauge. Unknown reason. Ignore because it will eventually stop.
· Push the back door forward to easily pull the pin up to open the back door.
J76
· New Jeep placed in service Dec 2022.
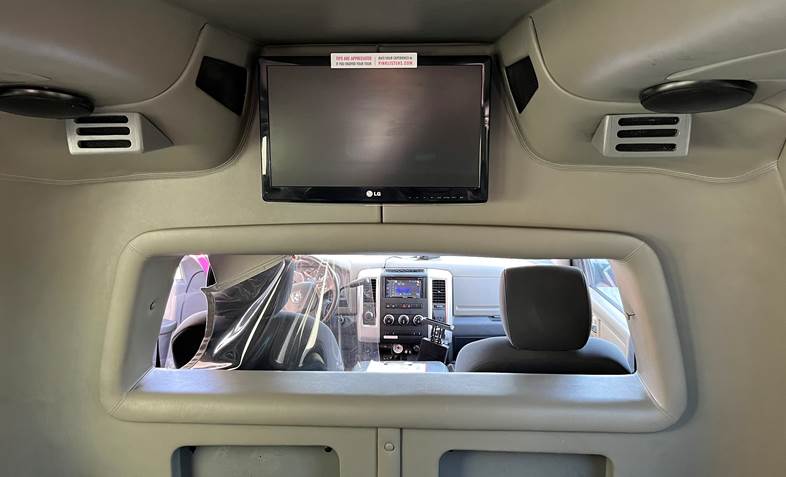
· Only Jeep with enclosed passenger area is enclosed providing protection from the elements and a more pleasant experience in the winter.
o The inside and outside of the plastic windows need to be cleaned regularly so the guests can clearly see and to reduce the potential for scratches.
· The
front window controls are electronic unlike the crank for the other Jeeps. The
control is in the center below the radio control.
T07 -
· Rear cab electric heaters are controlled by On/Off switch.
· Vehicle has a diesel heater control device, but no diesel heater since removed.
T13 -
· Manual AC controls and diesel heater controls for the rear cab.
· SERV 4WD constantly displayed because disconnected and not available. Do not write-up.
T14 -
· Manual AC controls and diesel heater controls for the rear cab.
T17 -
· AC and diesel heater controls for the rear cab.
· Frequent low wiper fluid alarm even though reservoir is full.
· Manual AC controls and diesel heater controls for
the rear cab.
T20 - Marketing
· Solid “SERV 4WD” constantly displayed because 4WD disconnected and not available.
· Manual AC controls and diesel heater controls for the rear cab.
· Vehicle
is wrapped for advertising and used for marketing purposes and misc training
uses, not for tours anymore.
T24 -
· Solid “SERV 4WD” constantly displayed because 4WD disconnected and not available.
· Rear door doesn't seal since lower portion of door severely bent.
· Occasional low wiper fluid alarm even though reservoir is full.
· Lumbar support broken.
· Driver mirror won't adjust up fully.
· Rear cab electric heaters
are controlled by On/Off switch.
T25 - Jane
· Manual AC controls and diesel heater controls for
the rear cab.
T26 -
· Manual AC controls for the rear cab.
· Only two AC vents unlike all the other trucks. They cannot be adjusted by the guests. Rear row receives least air flow so it is not ideal to have guests in the back row on hot days.
· Front windshield has blemishes which appear to indicate it is dirty when not.
· Rear cab electric heaters
are controlled by AUX 1 and AUX 2 buttons.
T27 -
· Manual AC controls for the rear cab.
· Rear cab electric heaters are controlled by AUX 1 and AUX 2 buttons.
· Vehicle
has a diesel heater device
in the rear cab under the rear seat, but it is disconnected, with no control
panel in the front.
T28 - Carol
- Manual AC controls for the rear cab.
- Rear cab electric heaters are controlled by AUX 1 and AUX 2 buttons.
- Rain leak issues sometimes in the front cab.
- Rear cab heater under the rear row is broken, AUX 2 doesn’t work.
- Vehicle has a diesel heater device in the rear cab under the rear seat, but it is disconnected, with no control panel in the front.
- The video screen is not working in the back. It needs to be addressed by the AV guy.
- The cruise control must be activated differently than any other truck. Turn it on, then press the – button, followed by the + button to activate. The +/- buttons can then be used to adjust the speed.
- Guests in the rear cab experience waterfalls inside the cab when raining. A seal somewhere is not secure.
T29 -
· Manual AC controls for the rear cab.
· Rear cab electric heaters are controlled by AUX 1 and AUX 2 buttons.
· Vehicle has a diesel heater device in the rear cab under the rear seat, but it is disconnected, with no control panel in the front.
T30 - Mark
· Manual AC controls for the rear cab.
· Rear cab electric heaters are controlled by AUX 1 and AUX 2 buttons.
· Rear AC thermostat under controls. If front AC is set to your feet, then the rear AC tends to stop functioning since the thermostat is cold.
· Electrical gremlin illuminates console light on/off when engine off and key out of ignition.
· Frequent Service Airbag System message and ding. Computer problem producing false error so ignore.
· Consistent solid air bag light caused by computer problem.
· Rear step latch is slightly misaligned requiring manipulation to secure. Easiest is to brace elbow against thigh to lift step slightly allowing for latch to enter the hole.
· Driver seat belt rarely rolls back up so ensure it lays on the seat prior to closing the door.
· Rear camera slightly out of focus.
T31 – John F.
· Manual AC controls for the rear cab.
· Rear cab electric heaters are controlled by AUX 1 and AUX 2 buttons.
· Vehicle has the Idle Timeout Shutoff/engine kill programmed into the computer.
T32 - Charles
· Manual AC controls for the rear cab to the lower right on the passenger side.
· Rear cab electric heater control is a dial below the steering wheel. The AUX buttons don’t do anything.
· TV has an HDMI port.
· Electrical gremlin illuminates console light on/off when engine off and key out of ignition.
· Water
drips from the front cab center area above the windshield during heavy rain.
T33 - Zack
· Rear cab electric heaters are controlled by AUX 1 and AUX 2 buttons.
· The gear shift occasionally sticks causing all the lights for the gears to illuminate. Simply jiggle the gear stalk to select the correct gear.
· Does not have a turn signal indicator on the driver rear view mirror like the passenger side.
· TV has HDMI port.
T34 -
· Rear cab electric heater control is below the steering wheel.
· Rear cab electronic AC control panel is to the right above the center console.
· Vehicle has the Idle Timeout Shutoff/engine kill programmed into the computer.
· Rear cab door won't lock.
· The backup camera display is blurry.
· One of the key fob block buttons is broken.
T35 -
· Rear cab electric heater control is below the steering wheel.
· Rear cab electronic AC control panel is to the right above the center console.
· The backup camera display is blurry.
· The rear step latch spring is broken so it pops out often when driving.
T36 – Don
- Rear cab electric heater control is below the steering wheel.
- Rear cab electronic AC control panel is to the right above the center console.
- The rear step latch spring is broken so it needs to be inserted manually.
T37 - Bob
- Rear cab electric heater control is below the steering wheel.
- Rear cab electronic AC control panel is to the right above the center console.
- The
backup camera display is blurry.
T38 –
- Rear cab electric heater control is below the steering wheel.
- Rear cab electronic AC control panel is to the right above the center console.
- The rear step needs to be pushed down to be able to insert hook into hole.
- DEF
door spring broken, must poke from inside by reaching underneath.
T39 - John G.
- Rear cab electric heater control is below the steering wheel.
- Rear cab electronic AC
control panel is to the right above the center console.
T40 - Mike
- Rear cab electric heater control is below the steering wheel.
- Rear cab electronic AC control panel is to the right above the center console.
- DEF door broken. Poke from underneath.
- The
ELD loses connection with the tablet regularly mostly when the engine is
off for about a half hour and sometimes while driving. Simply perform the Reset Tablet Bluetooth
Connection with the ELD procedure.
T41 - Stephen
- Rear cab electric heater control is below the steering wheel.
- Rear cab electronic AC control panel is to the right above the center console.
- The
driver’s seat does not have lumbar support nor micro-seat adjustments.
- Rear cab electronic AC control panel is to the right and below the steering wheel. It is partially blocked by the shifter when driving.
- Occasionally and intermittently, fan speed increases to 3 of 3 even though set to 1 of 3. Simply be aware and listen for the increase in fan speed, then adjust manually.
- Occasionally, the rear fan will turn on even though the panel is off. Simply press the Fan button in the upper right, then the Off button to the lower right to turn off the fan.
- Rear cab electric heater control is to the right below the Rear cab electronic AC control panel.
- Since so close together and close to the steering wheel, the heater control dial can be accidently turned on causing the rear cab to get warm unexpectedly. Guests will thus complain that they are “Getting warm back here!”
- Built-in microphone similar as the Jeeps
- One volume level that cannot be adjusted.
- 6 second delay for the microphone to function when turned on via the switch unlike the Jeeps which are instantaneous.
- The dials next to the jack will not adjust the volume. Although, it can adjust the clarity transmitted through the speakers.
- The volume control is based upon the proximity of the microphone to your mouth. The angle of the mic must be just right to ensure the guests can hear you clearly.
- Be careful not to break the wire.
- Keep in mind there is a mute switch on the cord.
- Microphone covers are stored in the center console.
- The radio will show mute on the screen when the microphone switch is set to off. Touching the Mute option on the screen will do nothing nor will any other option on the screen. Turn on the microphone to activate the radio. The volume can thus be adjusted on the screen but will not affect the microphone.
- Vehicle has the Idle Timeout Shutoff/engine kill programmed into the computer.
- Rear cab USB charger ports are controlled by the Aux 1 button so keep it active continually.
- The front fan can be delayed up to 5 seconds after turning the dial control.
- Intermittent solid check
engine light in the morning only in the winter months when starting the
vehicle due to a P2609 code for Intake Air Heater System Performance. The
problem is due to an expensive part which is labor extensive to replace
throwing a false reading which should only be related to below zero
temperatures. Not a problem with the vehicle’s performance so clear the
code and ignore.
- The ELD loses connection with the tablet regularly, mostly when the engine is off for about a half hour and sometimes while driving. Simply perform the Reset Tablet Bluetooth Connection with the ELD procedure to reconnect.
- Permit and emergency binder are stored under the driver seat.
- Rear cab does not have mesh pockets nor cup holders.
- The safety cards are stored under the windows below the arm rests using the open slot in the seat frame.
- Rear suspension cannot be adjusted within the front cab. The pressure is adjusted via two valve stems on driver side under the step bar near the rear dually tires. The system leaks so air needs to be added every day especially to the right valve. The pressure should be about 20-25 psi.
- The rear suspension feels a little rougher than other vehicles even when the air is added to the bags manually.
- Front passenger window control intermittently won’t allow the guest to lower the window. Instead, the driver can only raise the passenger window. Loose wire in panel.
- The headlight on passenger side is a little loose since accident July 2022. It is fine and won’t fall off.
- Some of the rear cab seat arm rests are narrow and plastic to address the problem of being twisted and torn off by guests as they exit the vehicle since the path is narrow.
- The rear cab seats are narrow. Eventually, they may be replaced with wider seats. (5/2022)
- The driver rear quarter panel has a known gash.
- The rear door in the lower right corner has a known dent.
- The driver’s seat does not have lumbar support nor micro-seat adjustments.
- Window hammer stored in rear cab in small storage area to the right of the rear cab door.
- No child seats can be installed in this vehicle since there is no tether nor anchor mounts.
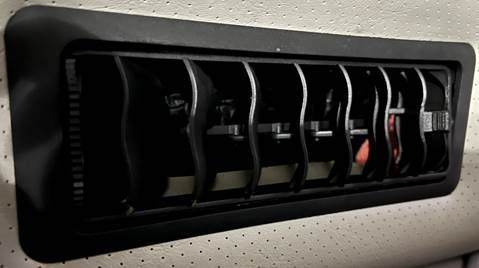
- The two rear vents have red towels shoved in the back for blockage as a jerry-rigged way to improve air flow for all the vents. Don’t remove the towels.
T43 - Jurgen
- Placed into service June 2023. Although, the vehicle has been in the yard since 2019.
- Vehicle has the Idle Timeout Shutoff/engine kill programmed into the computer.
- The rear cab floor is metal and is different than the other vehicles.
- Child
seats must only be installed on the single seat column behind the front
cab passenger seat.
- No cover for DEF access.
- Mic jack needs to be partially inserted to function. Much
more than the sing paper clip trick for other trucks. It needs to be
repaired by the 3rd party AV installer.
◦
TT2 –
· Driver
seat handle adjust is backwards.
TT4 –
- Trekker rear cab manual AC controls
- Trekker rear cab diesel heater controls
- fix-Black needle for the rear air bag broken.
-----------------------------------------------------------------------------------------------------------------------------------------------------------------------------------------------------------------------------
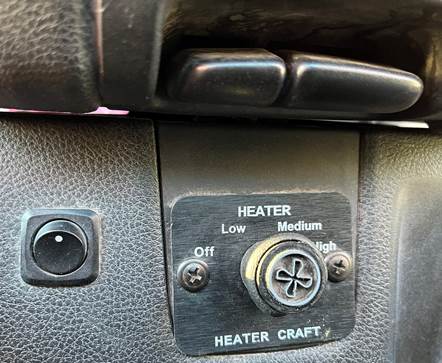
Jeep rear heater control TOP
· Located under the center storage area between the seats.
·
The switch on the left needs to be up (i.e., on)
along with the dial turned to the appropriate speed so the guests in the back
can enjoy heat from the engine.
· Booster control switch must remain on to ensure heat blows through the front vents.
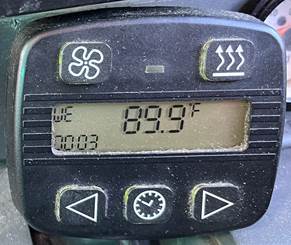
Trekker rear cab diesel heater controls TOP
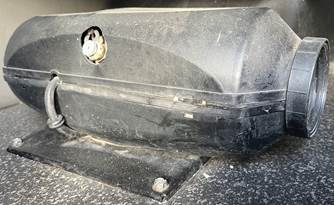
· The pad is the diesel heater control for the older 1st generation Trekkers.
· The wavy line button to the upper right is the on/off button. Once on, bars will appear to the right of the screen which is the temperature level. Use the arrows to lower the temperature to not overload the system initially because an error could occur. After reaching a moderate temperature, then increase slowly.
· If an error occurs, then press the clock button to clear the error. Wait until the diesel heater turns off before trying to reactivate. If an error constantly occurs, then note the error in the DVIR book.
· Do not run the diesel heater inside a closed garage due to the emissions. Turn off the diesel heater a couple minutes or so prior to entering an enclosed area to ensure the diesel heater shuts down properly and diesel fumes are not emitted in that enclosed area.
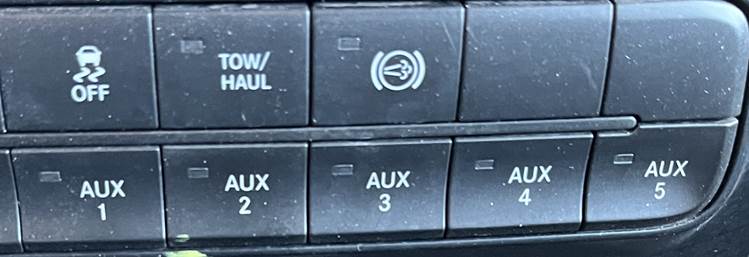
Trekker rear cab heater control-electric1 TOP
· Most
vehicles have the AUX 1 and AUX 2 buttons which control the rear heaters. AUX 1
is for the front of the cab. AUX 2 is for the rear of the cab.

T26:
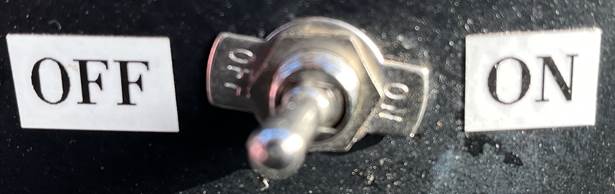
· Some vehicles have an On/Off switch which provides power to each of the two electric heaters in the rear cab.
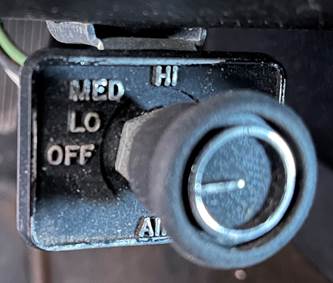
· One electric heat is under the first row behind the driver. The other is under the single seat for the rear row.
· The electric heater control dial controls the temperature. It is best to simply turn the dial clockwise all the way to the right. The switch controls the fan speed. Low is up, high is down. Each of the adjustments must be manually set prior to driving.
· The amount of heat emitted can be anemic at times. This configuration blows less hot air than the other electric heater control.
Trekker rear cab heater control-electric2 TOP

· The electric heater control for the rear cab is below the steering wheel.
· The heater is under the rear row double seats.
· The switch allows for control of the fan speed, but no temperature control. This configuration blows more hot air than the other electric heater control.
· A value needs to be toggled under the vehicle below the driver’s seat to allow for water to circulate to operate the heater system. The valve is turned off in the late spring by the mechanic, but needs to be turned on in the late fall as necessary.
o T42 is an exception because it has an electronic ignition switch which does not require a valve to be toggled.
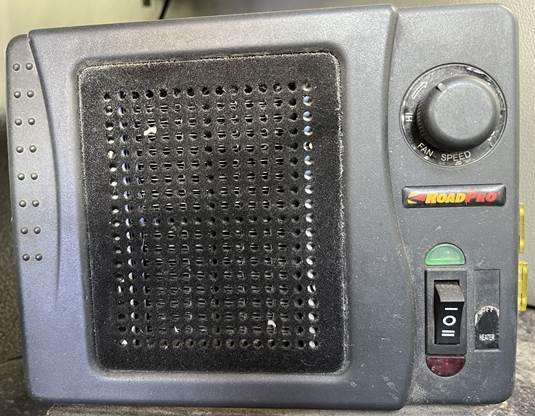
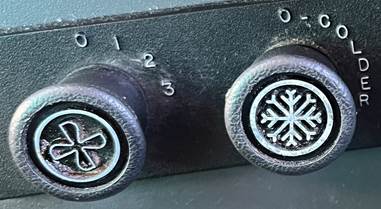
Trekker rear cab manual AC controls TOP
· The dial to the left controls the volume of the rear cab fan. 0 is off, 3 is maximum.
· The dial to the right simply turns the AC condenser on or off. Turning dial counterclockwise for off while turning dial clockwise for on. The AC temperature cannot be controlled; it is simple on or off.
· Turn both dials to the left (OFF) when not in use to ensure the rear AC does not activate and drain the battery. The wiring should have been configured to ensure the condenser does not turn on when the vehicle is off. Regardless, but to get in the habit to turn everything off. No one wants to encounter a dead battery in the field or the morning when prepping a vehicle.
· The rubber covering the dial can be loose and spin when attempting to turn the dial giving the impression the dial is broken when it is not. Simply be careful to ensure the dial is actually turned and not the rubber.
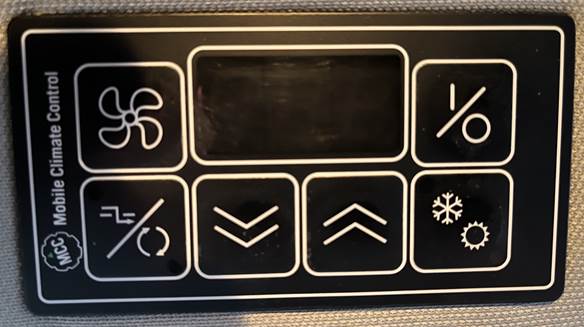
Trekker rear cab electronic AC control TOP
· The AC control will boot-up when the engine is turned on taking about 5 seconds displaying 1.80. Do not randomly press buttons during boot-up because a diagnostic mode can be activated which would render the system not functional.
· On/Off – upper right (I/O) – turns on the fan only
· AC On/Off – lower right (snowflake) – turns on the AC. A green light will appear indicating on. A flashing light indicates the compressor is not functioning and cold air will not flow through the vents.
· Fan Speed – upper left – adjusts fan speed 0 to 3 via the arrows.
· Arrows – used to adjust the fan speed and temperature up and down.
· Toggle the fan button as necessary so the arrows can be used to adjust the temperature or the fan speed.
· All the vehicles have a heater option installed, except T42, so increasing the temperature will activate warm air blowing out of the vents. For the case of T42, the unit will automatically stop blowing cold air when the AC On/Off (snowflake) is activated and the thermostat behind the rear cab monitor detects a temperature at the value set on the display. Cold air will blow through the vents when the appropriate temperature trips the thermostat sensor.
Vehicle Speedometer Error TOP
· Since the vehicles are fitted with aftermarket tires, the speedometer is not accurate for many of them since calibrated for the original tires from the factory.
· The Trekker speedometer error used to be up to about 8.5% higher. Now they range from about 2.7% higher speed to -4% lower speed than indicated on the speedometer.
· For instance:
· If the error is 2.7%, then when the speedometer indicates 65 mph, the actual speed is 66.8 mph.
· If the error is -4%, then when the speedometer indicates 65 mph, the actual speed is 62.5 mph.
· Keep
in mind, the ELD will transmit the reading on the speedometer to the cloud
which will then be recorded on the Motive application, not the actual speed
recorded by a GPS or police radar. That means if a guide driving a vehicle
which has a negative speed error tries to pace a guide driving a vehicle with
no or a positive speed error, then the former guide will receive a speeding
alert while the latter guide will not. The point is that all guides will simply
need to follow the prescribed speed limit indicated on the speedometer and be
aware of the error for the specific vehicle for the safety of the guests and
the guide along with eliminating the possibility of receiving a speeding
ticket.
Reset Tablet Bluetooth Connection with the ELD TOP
· From within the motive app, disconnect from the current vehicle by selecting the vehicle in the upper right, then selecting “Leave the Current Vehicle”.
· Press the Home button on the tablet.
· Open the Setting App.
· Select Bluetooth.
· Select the circled ‘I’ for the vehicle’s ELD, then select ‘Forget This Device’. Select ‘Forget Device’.
o If multiple devices are listed, you might as well forget all of them by selecting them individually.
o The vehicle’s ELD can be determined by looking under the ELD.
o If the tablet won’t forget the device, then turn off Bluetooth, then turn back on again. Now, you’ll be able to forget the device.
· Reset Bluetooth by turning it off, then on.
· While the vehicle’s engine is on, then reconnect to the ELD via Motive when the ELD lights are lit. The lights will light up after a several seconds when the engine is turned on.
o Don’t try to reconnect until the left light is green.
o If you try to connect before the light is green, then you’ll have to repeat the steps above to Leave the Current Vehicle and Forget This Device.
· If the ELD still does not reconnect to the tablet, then repeat the above instructions while the vehicle’s engine is on. Although, after resetting the Bluetooth, then wait for the ELD device name to appear. Once it appears, then select that device to connect manually. Afterwards, reconnect to the ELD via the Motive app.
·
If the ELD still does not reconnect to the
tablet, then a hard reset of the ELD is necessary. Remove the big cable from
the ELD by unscrewing it from the device, then wait for up to five minutes or
when the lights turn off. The vehicle does not need to be on during this step.
Don’t worry about removing the smaller cable since that is the antenna.
Reattach the cable and recrew to the device. Repeat the above instructions.
·
If none of the above steps work, then the ELD is
malfunctioning or a cable might be bad.
· Normally, a manual log would be thus necessary. Although, the Motive app can still be used in place of a manual log.
o From within the Motive app, disconnect from the current vehicle.
o Manually switch the Duty Status back and forth from On Duty to Driving as necessary to ensure the proper duty status is recorded.
§ The Motive administrator configuration allows for such an option to be performed by the driver instead of reverting to a manual logbook.
o
Eventually, the ELD could reconnect to the
tablet automatically or you can reconnect manually. If so, then conflicting
driving events will appear requiring you to change the manually entered Driving
events to On Duty with a Note of “Correction”. Afterwards, then accept the
unassigned driving events to reconcile the logbook ensuring compliance.
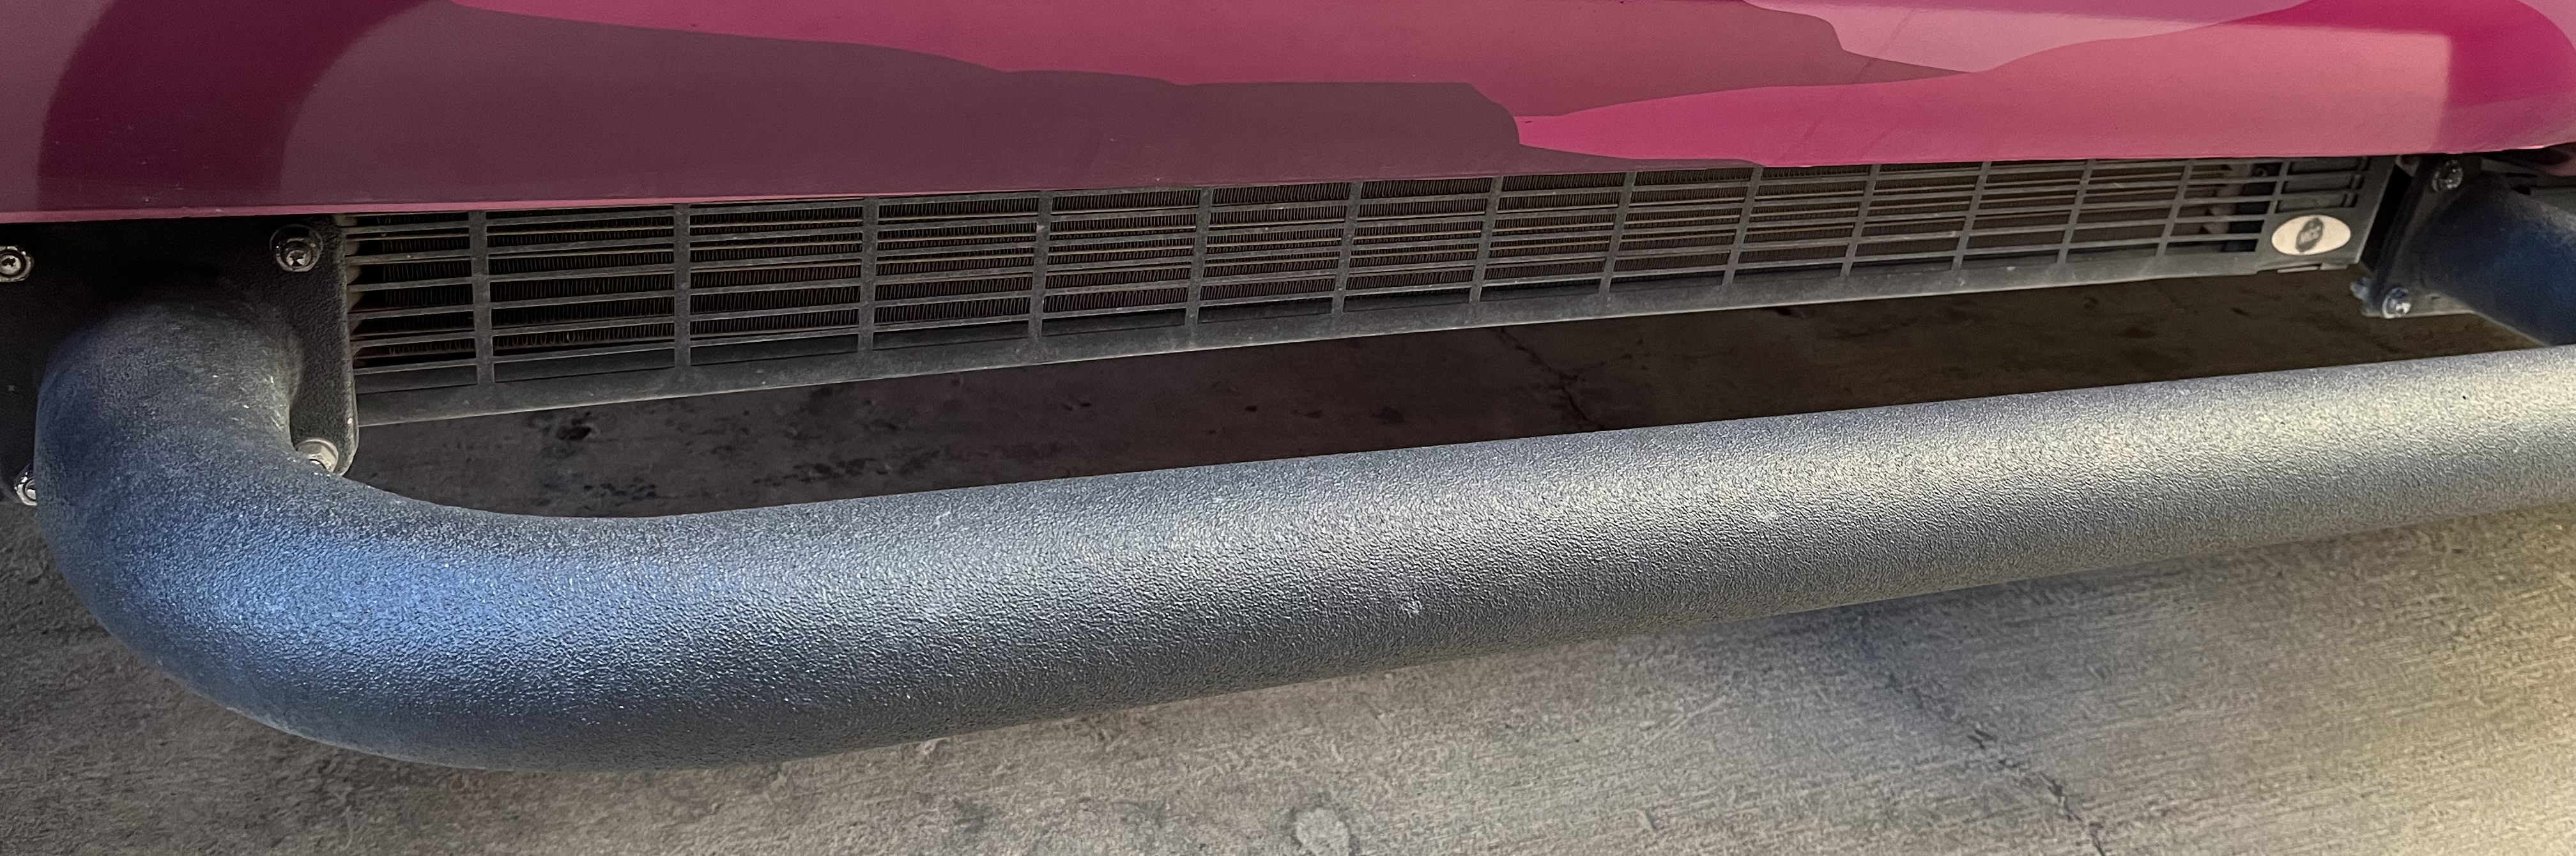
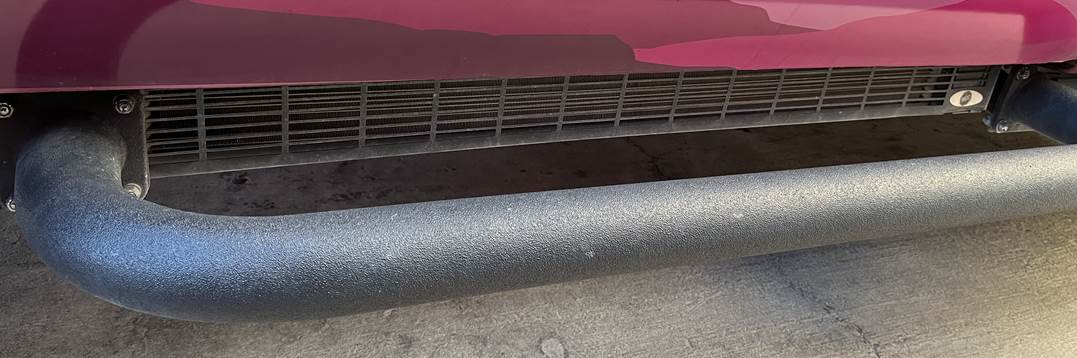
Trekker rear AC information TOP
· The Trekker rear AC unit is an after-market product which is installed below the passenger side of the rear cab.
· The controls depend upon the model year of the truck. The older trucks are manual while the newer trucks are electronic.
· The air intake and fan blower for the rear cab are behind the television.
· The fan speed three option is very loud for every vehicle.
· When the AC system is activated from the front cab, the fan in the rear cab will be heard along with a distinctive hum from underneath the rear cab passenger side. If there is no hum heard from under the rear cab passenger side, then the AC condenser is not working, and no cold air will blow out of the rear cab vents. If so, then turn off the rear cab AC so further damage to the unit does not occur. It is okay for the fan to operate without the AC condenser turned on since separate units.
o If the rear AC fails while in the field, then a temporary and minimal solution to provide comfort for the guests is to turn the two inner front vents towards the center of the opening between the front and rear cabs along with closing the two outer vents while blowing the front cab AC and fan to maximum. Doing this will at least provide some amount of cold AC to the rear cab.
· The air for the rear cab is recycled. There is no option to introduce fresh air except by turning the two inner front vents towards the center of the opening between the front and rear cabs and increasing the front cab fan speed to flow fresh air to the rear cap. If doing so, then ensure the Recycle button (older trucks) or Max AC (newer trucks) option is not activated which recycles the air in the front cab. The intention is to provide fresh air from outside instead of recycling the air inside the vehicle.
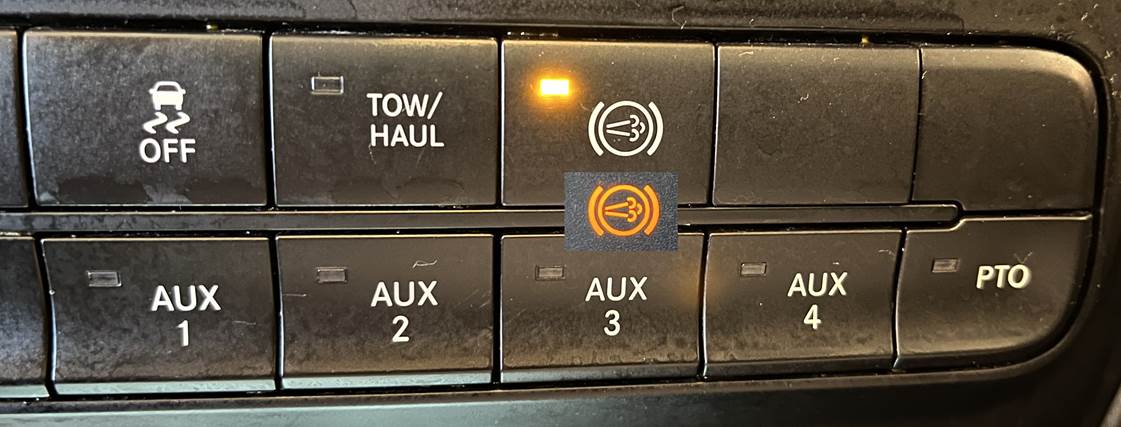
Trekker engine brake information TOP
· The Trekkers have an engine brake which should be engaged constantly.
· The button for the newer model vehicles is displayed below with the associated light on the instrument panel indicating the engine brake is active.
· Once the accelerator is no longer depressed, the engine brake will engage and slow down the vehicle much faster than friction. A vibrating noise will be heard indicating the engine brake is active. It will slow down the vehicle for low-grade hills, but not high-grades.

· NOTE: If the engine brake is engaged and the vehicle does not make a vibrating noise nor slow down, then alert the mechanic for repair.
Idle Timeout Shutoff TOP
· The vehicle has been configured electronically by modifying the computer setting to activate the idle timeout shutoff feature, AKA. Engine Kill.
· The newer model truck’s engine will turn off when the vehicle is in park after 5 minutes.
o Note: When the engine kill activates, most accessories will still be activated which could drain the battery so be sure to deactivate the accessories.
· The bypass procedure is to engage the “High Idle” setting by turning on the cruise control, then selecting the Set button (button normally meant to engage cruise control). The RPMs will then increase and the engine revs. The bypass deactivates when the brake is applied or cruise control is turned off.
Exhaust System Regeneration TOP

· For the vehicles to be more environmentally friendly, some carbon is stored in an exhaust system to be burned in the engine when idling or at slow speed. Although, the exhaust system filter can fill up causing this error message to be displayed. The issue can be addressed at the dealership for an expensive service call or simply drive the vehicle at highway speeds to allow the carbon to be processed.
·
When this message is displayed don’t be alarmed
because the system will process the excess/built up carbon. After several
minutes, the display will indicate 90%. Several minutes later, then 80%. Then,
the message will disappear because the system is functioning within normal
parameters.
· The problem can be prevented by not idling for too long without moving. Such as sitting in the vehicle with the air conditioning on to stay cool for long periods of time and often without driving at highway speeds afterwards.
Tips for maintaining consistent speed TOP
· Since the company considers speeding a high priority, it is important to maintain a consistent safe speed. Therefore, the following tips can help you maintain a safe, constant speed.
· The Motive fleet management software is currently configured to flag a speeding event if driving more than 5 mph over the configured posted speed limit for more than two minutes. Although, if the vehicle exceeds 5 mph for less than two minutes as part of a process for passing another vehicle, a brief downhill slope, or whatever miscellaneous reasons, then the software will not flag as a speeding event. Only a sustained speeding event will be flagged. The issue can be mitigated as follows:
o
You are not
driving your personal vehicle, instead you are driving a commercial vehicle
with commercial passengers, so your thought process needs to be adjusted
accordingly.
o
Be mindful, ensure a safe speed is maintained
and be aware of your surroundings.
§
“Making up time!” is not considered an
acceptable behavior!
§
Watch for the varying speed limit signs and
remember them since we travel the same roads often.
o Ensure the engine brake is always engaged.
o Use cruise control to maintain a consistent speed.
§ Set the cruise control to 1 or 2 mph lower than the software threshold is the best method to ensure adequate response time and cushion when using the outlined techniques to prevent a speeding event for normal driving and particularly while navigating steep grades or passing while ensure safe control of the vehicle along with comfort and safety for the guests.
§ The use of the cruise control also provides you the opportunity to direct more attention to the road as opposed to the speedometer.
o Down shift to a lower gear when on a hill for a sustained distance.
§ Anticipate the need to lower the gear while also lifting your foot off the accelerator prior to the hill.
§ The engine will rev a bit so be careful not to lower the gear too much reaching the redline. If so, then increase to a higher gear.
§ Minimally use the brake so attention is directed primarily to the road and not the equipment just like the training for the Jeep on Rocky Gap.
· If the cruise control is not functioning properly, then alert the mechanic so it can be repaired.
· Also, look ahead by aiming high along with using the mirrors to look behind to anticipate the future so a Hard Brake event is minimized. Apply the brakes somewhat gently (basically responsibly) without causing a jolt so a Hard Brake event does not occur. You don’t need to drive “Like a grandma!”
· There is no need for a jackrabbit start which will cause a Hard Acceleration event. Steady acceleration is sufficient without having to punch the pedal to the floor causing the guests to be pressed against their seat.
· No need to drift the truck causing a Hard Corner event. If turning a corner causes you to compress your mid-section, guests clench the armrest, or objects fly around the vehicle, then you took the corner too hard!